Introduction
In this post I just want to show how easily is to get started with Couchbase, and also explain how to “query” the data. The basic steps of this tutorial are:
- Install Couchbase
- Create Data
- Query Data
I will try to post more articles, if I have time to show how to use Couchbase from your applications (starting with Java).
Prerequisites :
- Could not be simpler : Couchbase 2.0 available here. (Currently in Developer Preview)
Couchbase 101 : Insert and Query data
Installation
I am using Couchbase on Mac OS X, so let me describe the installation in this environment. If you are using other operating system just take a look to the Couchbase documentation.
Couchbase installation is very (very!) fast:
- Download the Mac OS X Zip file.
- Double-click the downloaded Zip installation file to extract the contents. This will create a single file, the Couchbase.app application.
- Drag and Drop the Couchbase.app to your chosen installation folder, such as the system Applications folder.
Start and Configure Couchbase Server
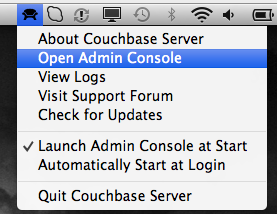
To start Couchbase Server, just double click on the Couchbase Server. Once the server is started, a new icon is added in the OS X Menu to indicate that the Server is up and running.
You can now configure your Couchbase instance, for this you just need to access the Admin Console, available at the following location http://127.0.0.1:8091 (change the IP address if needed) or simply by going in the Couchbase menu and click on Open Admin Console entry.

- Welcome Screen : Click Setup
- Set the disk and cluster configuration. On my instance I keep the default location for the on disk storage. Just configure the size of the memory usage for your instance, for example 800Mb. So far, we have a single instance, so no need to join a cluster.
- Choose to generate sample data. This will be interesting to learn more about data and views.
- Create
the defaultbucket (use for testing only). A bucket is used by Couchbase to store data. It could be compared to a “database” in RDBMS world. - Configure update notifications to be alerted when new version of Couchbase is released
- Configure the server with a final step with the administrator username and password
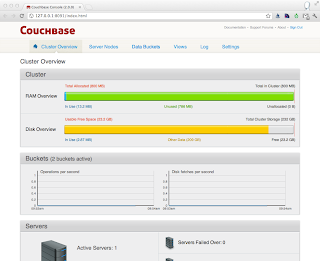
- When this is done you are automatically redirected to the Admin Console.

This is it! You are ready to use your Couchbase server.
Couchbase has many interesting features, especially around scalability and elasticity but for not in this article let's focus on the basics :
- Insert some data and query them
Insert Data
Couchbase has many ways to manipulate data from you favorite programming language using the different client libraries : Java, Python, PHP, Ruby, .Net, C. For now let's use the Admin Console to create and query data.
Couchbase can store any type of data, but when you need to manipulate some data with a structure the best way is to use JSON Documents. So let's use the console and create documents.
To create new documents in your database, click on the "Data Buckets" tab. If you have installed the sample you see 2 buckets: default and gamesim-sample.
Let's create a new documents in the default bucket:
- Click on Documents button
- Click on Create Document
- Since each document must have an id for example 100.
- Couchbase save the document and add some metadata such as _rev, $flags, expiration
- Add new attributes to the document that describe an employee : Name, Departement and Salary, then save it. You just need to update the JSON object with values
{
      "_id": "100",
      "name": "Thomas",
      "dept": "Sales",
      "salary": 5000
  }
Repeat the operation with some other employees :
  200,Jason,Technology,5500
  300,Mayla,Technology,7000
  400,Nisha,Marketing,9500
  500,Randy,Technology,6000
  501,Ritu,Accounting,5400
You have now a list of employees in your database. That was easy isn't? Let's now query them.
Query Data
Access document directly from its ID
First of all you can quickly access a document using a simple HTTP request using its id. For example to access the Mayla with the id 300 just enter the following URL:
http://127.0.0.1:8092/default/300
In this URL you have :
8092is the Couch API REST port used to access data (where 8091 is the port for the Admin console)defaultis the bucket in which the document is stored300is the id of the document
Search your data with queries
So we have seen how you can access one document. But what if my need is :
- "Give me all the employee of the Technology department"
To achieve such query it is necessary to create views. The views are used by Couchbase server to index and search your data. A view is a Map function written in JavaScript, that will generate a key value list that is compliant with logic you put in the Map function. Note that this key,value is now indexed and sorted by key. This is important when you query your data.
So let's create a new view from the Admin Console:
- Click on the Views tab (be sure you are on the default bucket)
- Click on the "Create Development View"
- Enter the Document and View name:
- Document Name : _design/dev_dept
- View Name : dept
- Cick Save
- Click on your View to edit it
Since we need to provide the list of employees that are part of a the Technology department, we need to create a view that use the department as key, so the map function looks like :
function (doc) {
    emit(doc.dept, null);
}
Save the view
This function takes the document and create a list that contains the "dept" as key and null as value. The value itself is not that important in our case. A simple rule will be : do not put too much data in the value since at the end Couchbase server creates an index with this map. Will see that Couchbase allows developer to easily get the document information when accessing a view.
Click on the "Show Results" button, the result will look like:
{"total_rows":6,"rows":[
  {"id":"501","key":"Accounting","value":null},
  {"id":"400","key":"Marketing","value":null},
  {"id":"100","key":"Sales","value":null},
  {"id":"200","key":"Technology","value":null},
  {"id":"300","key":"Technology","value":null},
  {"id":"500","key":"Technology","value":null}
  ]
}
As we have seen in earlier it is possible to access the document using a single URL, it is the same for views. You can for example access the view we have just created using the following URL:
Now it is possible to use query parameter to filter the results using the key parameter with the value entered using a JSON String :
The result of this query is now :
{"total_rows":6,"rows":[
  {"id":"200","key":"Technology","value":null},
  {"id":"300","key":"Technology","value":null},
  {"id":"500","key":"Technology","value":null}
  ]
}
You have many other parameters you can use when accessing a view to control the size, the time out, .... One of them is quite interesting is include_docs that ask Couchbase to include the full content of the document in the result. So if you call :
The result is :
{"total_rows":6,"rows":[
  {"id":"200","key":"Technology","value":null,"doc":  {"_id":"200","_rev":"1-1de6e6751608eada0000003200000000","$flags":0,"$expiration":0,"name":"Jason","dept":"Technology","salary":5500}},
  {"id":"300","key":"Technology","value":null,"doc":{"_id":"300","_rev":"1-f3e44cee742bfae10000003200000000","$flags":0,"$expiration":0,"name":"Mayla","dept":"Technology","salary":7000}},
  {"id":"500","key":"Technology","value":null,"doc":  {"_id":"500","_rev":"1-05780359aac8f3790000003200000000","$flags":0,"$expiration":0,"name":"Randy","dept":"Technology","salary":6000}}
]
}
Let's now create a little more complicated view to answer the following business requirement:
- "Give me all the employee with a salary between 5000 and 6000"
So now you know that you need to create a new view with the salary as key let's with the following Map function:
function (doc) {
  emit(doc.salary, null);
}
Couchbase is automatically sorting the key when creating/updating the index so, let's use the startkey and endkey parameter when calling the view. So let's call the view with from the following URL:
The result is :
{"total_rows":6,"rows":[
 {"id":"100","key":5000,"value":null,"doc":{"_id":"100","_rev":"1-0f33580d780014060000002e00000000","$flags":0,"$expiration":0,"name":"Thomas","dept":"Sales","salary":5000}},
 {"id":"501","key":5400,"value":null,"doc":{"_id":"501","_rev":"1-b1fe5bc79637720e0000003100000000","$flags":0,"$expiration":0,"name":"Ritu","dept":"Accounting","salary":5400}},
 {"id":"200","key":5500,"value":null,"doc":{"_id":"200","_rev":"1-1de6e6751608eada0000003200000000","$flags":0,"$expiration":0,"name":"Jason","dept":"Technology","salary":5500}},
 {"id":"500","key":6000,"value":null,"doc":{"_id":"500","_rev":"1-05780359aac8f3790000003200000000","$flags":0,"$expiration":0,"name":"Randy","dept":"Technology","salary":6000}}
]
}
Conclusion
In this short article you have learn how to:
- Install Couchbase* Create data using the Admin Console
- Query data with views
When I get more time I will write another article that do the same from Java, and other languages.
Note from @ingenthr
Nice blog! Note that while querying the REST interface directly is okay, we've really tried to make it easy by having high-level language support for queries in each of the official client libraries. They're all listed over at http://www.couchbase.com/develop