Note : This article has been written in March 2013, since Couchbase and its drivers have a changed a lot. I am not working with/for Couchbase anymore, with no time to update the code.
A friend of mine wants to build a simple system to capture ideas, and votes. Even if you can find many online services to do that, I think it is a good opportunity to show how easy it is to develop new application using a Couchbase and Node.js.
So how to start?
Some of us will start with the UI, other with the data, in this example I am starting with the model. The basics steps are :
- Model your documents
- Create Views
- Create Services
- Create the UI
- Improve your application by iteration
The sources of this sample application are available in Gihub :
https://github.com/tgrall/couchbase-node-ideas
Use the following command to clone the project locally :
git clone https://github.com/tgrall/couchbase-node-ideas.git
Note: my goal is not to provide a complete application, but to describe the key steps to develop an application.
Model your documents
For this application you need 3 types of document :
- Ideas : describes the idea with a author, title and description
- Vote : the author and a comment - note that it is a choice to not put a value for the vote, in this first version if the vote exists this means user like the idea.
- User : contains all the information about the user (not used in this first version of the application)
You can argue that it is possible to put the votes as a list of element inside the idea document. In this case I prefer to use different document and reference the idea in the vote since we do not know how many votes/comments will have. Using different documents is also interesting in this case for the following reasons :
- No "concurrent" access, when a user wants to vote he does not change the idea document itself, so no need to put an optimistic locking in place.
- The size of the document will be smaller and easier to cache in memory.
So documents will look like:
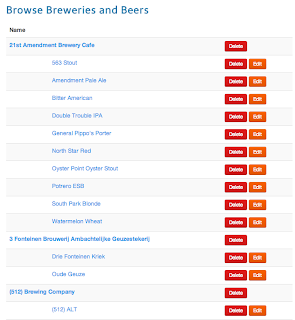
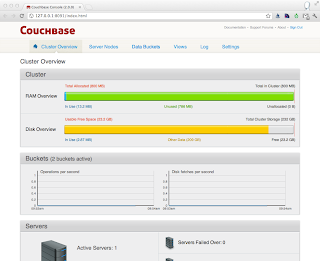
What I really like is the fact that I can quickly create a small dataset to validate that it is correct and help me to design the view. The way I do it, I start my server, launch the Couchbase Administration Console, create a bucket, and finally insert document manually and validate the model and views.
Create Views
Now that I have created some documents, I can think about the way I want to get the information out of the database. For this application I need:
- The list of ideas
- The votes by ideas
The list of idea for this first version is very simple, we just need to emit the title:
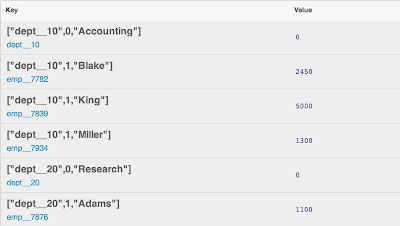
For the votes by ideas, I choose to create a collated view, this will give me some interesting options when I will expose them into an API/View layer. I am also for this view using sum() reduce function to be sure I capture the number of votes.
I have my documents, I have some views that allow me to retrieve the list of ideas, the number of vote by idea and count the vote... So I am ready to expose all these informations to the application using a simple API layer.
Create Services
Lately I have been playing a lot with Node.js, just because it is nice to learn new stuff and also because it is really easy to use with Couchbase. Think about it Couchbase loves JSON, and Node.js object format is JSON, this means I do not have any marshaling/unmarshaling to do.
My API layer is quite simple, I just need to create a set of REST endpoint to deal with:
- CRUD operation on each type of document
- List the different Documents
The code of the services is available in branch 01-simple-services:
You can run the application with simple services using the following command:
> git checkout -f 01-simple-services
> node app.js
and go to you browser using the http://127.0.0.1:3000
About the project
For this project I am using only 2 node modules Express and Couchbase. The package.json file looks like :
{
  "name": "couchbase-ideas-management",
  "version": "0.0.1",
  "private": true,
  "dependencies":
  {
    "express": "3.x",
    "couchbase": "0.0.11"
  }
}
After running the install, let's code the new API interface, as said before I am using an iterative approach so for now I am not dealing with the security, I just want to get the basic actions to work.
I am starting with the endpoints to get and set the documents. I am creating a generic endpoints that take the type as URI parameter allowing user/application to do a get/post on /api/vote, /api/idea. The following code captures this:
In each case I start to test if the URI is one of the supported types (idea, vote, user) and if this is the case I call the get() or upsert() method that will do the call to Couchbase.
The get() and upsert() methods are using more or less the same approach. I test if the document exists, if the type is correct and do the operation to Couchbase. Let's focus on the upsert()`` method. I call it upsert()` since the same operation is used to create and update the document.
In this function I start by testing if the document contains a type and if the type is the one expected (line 3).
Then I check if the document id is present, to see if I need to create it or not. This is one of the reason why I like to keep the id/key in the document, yes I duplicate it, but it makes the development really easy. So if I have to create a new document I have to generate a new id. I chose to create a counter for each type. this is why I call the incr function (line 7) and then use the returned value to create the document (line 10).
Note: as you can see, my documents contain the an ID as part of the attributes. This ID is the same value that the one used to set the document (the "key"). It is not necessary a good practice to duplicate this information, and in many case the application only use the document key itself. I personally like to put the ID in the document itself too, because it simplifies a lot the development.
If the ID is present, I just call the update operation to save the document. (line 15)
The delete operation is equivalent to the get, using the delete HTTP operation.
So now I can get, insert and update the documents. I still need to do some work to deal with the lists. As you can guess, here I need to call the views. I won't go in the detail of the simple list of ideas. Let's focus on the view that shows the result of the votes.
For this part of the application I use a small trick to use the collated view. The /api/results/ call returns the list of ideas with their title and the total number of votes. The result looks like the following:
Note that it is also possible to select only one idea , you just need to pass the id to the call for example.
If you look in more detail the function, not only I call the view, but I build an array in which I put the idea id, label, then on the next loop, I add the number of vote. This is possible because the view is a collated view of the ideas and its votes.
I have now my REST Services, including advanced query capabilities. It is time now to use these services and build the user interface.
Create the UI
For the view I am using AngularJS, that I am packaging in the same node.js application for simplicity reason
Simple UI without Login/Security
The code of the application without login is available branch in 02-simple-ui-no-login
You can run the application with simple services using the following command:
> git checkout -f 02-simple-ui-no-login
> node app.js
The application is based on AngularJS and Twitter Boostrap.
I am using basic feature and packaging for Angular :
/public/js/app.jscontains the module declaration and all the routes to the different views/controllers/public/js/controllers.jscontains all the controller. I will show some of them but basically this is where that I call the services that I have created above./views/partials/contains the different pages/screens used by the application.
Because the application is quite simple I have not done any packaging of directive, or other functions. This is true at for AngularJS and Node.js parts.
Dummy user management
In this first version of the UI I have not yet integrated any login/security, so I fake the user login using a global scope variable that $scope.user that you can see in the controller AppCtrl(). Since I have not yet implemented the login/security, I have added at the bottom of the page a textfield where you can enter a "dummy" username to test the application. This field is inserted in the /views/index.html page.
List Views and Number of Votes
The home page of the application contains the list of ideas and number of votes.

Look at the EntriesListCtrl controller and the view/index.html file. As you can guess this is based on the Couchbase collated view that return the list of ideas and number of vote.
Create/Edit an idea
When the user click on the New link in the navigation, the application call the view /view/partials/idea-form.html. This form is called using the "/#/idea/new" URL.
Just look at the IdeaFormCtrl controller to see what is happening :
function IdeaFormCtrl($rootScope, $scope, $routeParams, $http, $location) {
  $scope.idea = null;
    if ($routeParams.id ) {
        $http({method: 'GET', url: '/api/idea/'+ $routeParams.id }).success(function(data, status, headers, config) {
                $scope.idea = data;
            });
    }

    $scope.save = function() {
        $scope.idea.type = "idea"; // set the type
        $scope.idea.user_id = $scope.user;
        $http.post('/api/idea',$scope.idea).success(function(data) {
            $location.path('/');
        });
    }
    $scope.cancel = function() {
        $location.path('/');
    }

}
IdeaFormCtrl.$inject = ['$rootScope', '$scope', '$routeParams','$http', '$location'];
First of all I test if the controller is called with a idea identifier in the URL ( $routeParams.id - line 3) . If the ID is present, I call the REST API to get the idea and set it into the $scope.idea variable.
Then on line 9, you can see the $scope.save() function that calls the REST API to save/update the idea to Couchbase. I use the line 10 and 11 to set the user and the type of data to the idea.
Note: It is interesting to look at these lines, by adding the two attributes (user & type) I modify the "schema" of my data. I am adding new fields to my document that will be stored as it is in Couchbase. Once again, you see here that I drive the data type from my application. I could take another approach and force the type in the service layer. For this example I chose to put that in the application layer, that is supposed to send the proper data types.
Other Interactions
The same approach is used to create a vote associated to a user/idea as you can see in the VoteFormCtrl controller.
I won't go in all the details of all operations, I am just inviting you to look at the code of the application, and feel free to add comment to this blog post if I need to clarify other part of the application.
Iterative Development : adding a value to the vote!
The code of the services is available in branch 01-simple-services:
You can run the application with simple services using the following command:
> git checkout -f 03-vote-with-value
> node app.js
Adding the field in the form
Something that I really like about working with AngularJS, Node and Couchbase is the fact that the developer uses JSON from the database to the browser.
So let's implement a new feature, where instead of having only a comment the user can give a rate to its vote from 1 to 5. Doing that is quite easy, here are the steps:
- Modify the UI : adding a new field
- Modify the Couchabe View to use the new field
This is it! AngularJS deals with the binding of the new field, so I just need to edit the /views/partials/idea-form.html to add this. For this I need to add the list of values in the controller and expose it into a select box in form.
The list of value located in the $scope.ratings variable :
Once this is done you can add a select box into your view using the following code :
To add the select box into the form, I just use AngularJS features:
- the list of value described in my controller using the
ng-optionsattribute - the binding to the vote.rating field object using
ng-modelattribute.
I am adding the field in my form, I bind this field to my Javascript object; and... nothing else! Since my REST API is just consuming the JSON object as it is, AngularJS will send the vote object with the new attribute.
Update the view to use the rating
Now that my database is dealing with a new attribute in the vote, I need to update my view to use this in the sum function. (I could calculate an average too, but here I want the sum of all the vote/ratings).
The only line that I have changed is the line number 7. The logic is simple, if the rating is present I emit it, if not I emit a 2, that is a medium rating for an idea.
This is a small tip that allow me to have a working view/system without having to update all the existing document if I have some.
I'll stop here for now, and will add new feature later such as User Authentication and User Management using for example Passport.
Version and Upgrade Management
If you looked closely to the code of the application the views are automatically imported from the app.js file when the application is starting.
In fact I have added a small function that check the current version installed and update the views with the correct version when needed.
You can look at the function initApplication() :
- Load the version number from Couchbase (document with ID "
app.version") - Check the version of if this is different
- Update/Create the view (I am doing it in production mode here, in real application it will be better to use dev mode - just prefix the design document ID with
"dev_") - Once the view is created update/create the
"app.version"document with the new ID.
Conclusion
In this article we have seen how you can quickly develop your application/prototype and leverage the flexibility of NoSQL for developers. The steps to do this are:
- Design your document model and API (REST)
- Create the UI that consumes the API
- Modify your model by simply adding field into the UI
- Update the view to adapt your lists to your new model
In addition to this, I have also quickly explain how you can from your code control the version of your application and deploy new views (and other things) automatically.
I will post another blog post in few days to explain how you can easily integrate user management, security to your application and database easily