
22 posts tagged with "java"

View All Tags

· 2 min read

In my Quarkus application, I encountered a hiccup with the Panache ORM while implementing and testing a REST service. Specifically, I faced a test failure related to the automatic update of a specifications list after deleting an element from the JSON/Entity. In this blog post, I'll walk you through the issue and demonstrate how GitHub Copilot came to the rescue, streamlining the implementation of a solution.

The Challenge:

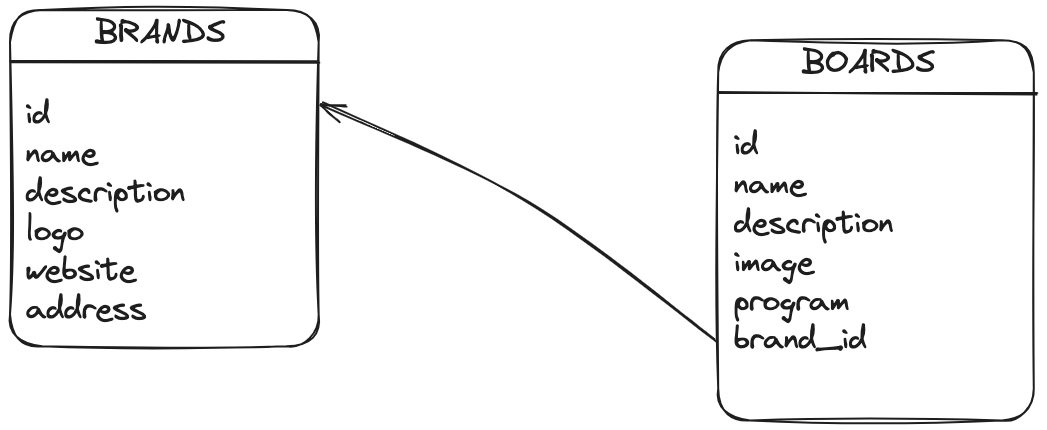
The JSON schema for my REST service looked like this:

{
"id": 1,
"name": "Fanatic Falcon",
"description": "Slalom board",
"specifications" : [
{"id": 10, "name": "Falcom 100", "volume": 100},
{"id": 11, "name": "Falcom 110", "volume": 110},
{"id": 12, "name": "Falcom 120", "volume": 120}
]
```
}

I had a test verifying the number of specifications after the deletion of one of them. However, the Panache ORM didn't automatically update the specifications list after deletion, leading to a failing test.

The Solution:

To address this issue, I needed to implement business logic to delete specifications in the database that were not present in the JSON payload. I documented the logic in a comment and collaborated with GitHub Copilot to generate the code.

Here's a snippet of the code:

...

// if the number of specifications in the existing board is different than the number of specifications in the updated board
// it means that some specifications have been removed, so we need to delete them
// for this we meed to loop on existing specifications and see if they are in the updated board
// if they are not add them to a list of specs to delete
// then use removeAll on existing board specifications
List<BoardSpecification> specsToDelete = new ArrayList<>();
for (BoardSpecification existingSpec : existingBoard.specifications) {
boolean found = false;
for (BoardSpecification spec : board.specifications) {
if (existingSpec.id.equals(spec.id)) {
found = true;
}
}
if (!found) {
specsToDelete.add(existingSpec);
}
}
existingBoard.specifications.removeAll(specsToDelete);
existingBoard.persist();

...

Check out the video below to witness how I leveraged GitHub Copilot to easily implement the business logic.

Once again, GitHub Copilot has proven to be an invaluable coding companion, significantly enhancing my efficiency and helping me overcome challenges in my coding journey. With its assistance, I navigated through the intricacies of the Panache ORM and successfully resolved the test failure, ensuring the seamless functionality of my Quarkus application.

· 2 min read

Java: Using MessageFormat to Generate JSON

As developers, we often encounter situations where we need to generate a JSON string for debugging purposes, especially when dealing with REST services. While frameworks like Spring Boot or Quarkus typically handle this task seamlessly, there are instances where manual intervention is required.

In a recent scenario, I found myself faced with this challenge. Traditionally, I had relied on string concatenation for such tasks. However, eager to explore more efficient alternatives, I turned to Java's java.text.MessageFormat to simplify the process.

· 5 min read

Quarkus: Database Projection with Panache

Welcome back to the second installment of our exploration into Quarkus and Panache! In the previous blog post, we delved into setting default values for Panache entity fields. Now, as we continue refining the WindR.org website with Quarkus integration, our primary focus shifts to implementing Database Projection with Panache.

Code Example on GitHub:

To accompany this discussion, I've published the complete code example on GitHub, providing you with a hands-on reference for learning and experimentation.

GitHub Repository: Learning Quarkus: Database Projection with Panache

Understanding the data model

For this illustrative example, we'll work with a straightforward data model consisting of two tables: 'boards' and 'brands.' The 'boards' table contains a list of windsurfing boards, while the 'brands' table serves as a reference, linked to the 'boards' table through a foreign key relationship.

Quarkus: Default Values for Panache Entity Fields

· 2 min read

In the process of crafting an updated version of the product catalog for WindR.org, the need to generate sample data arises. Leveraging the power of Quarkus and Panache, I find myself tasked with creating entities that embody various technical specifications for "windsurfing boards" – encompassing attributes like size, volume, width, and more.

Recognizing the potential tedium associated with manually creating this data, I turned to GitHub Copilot for assistance. The approach I took involved visiting a public website housing a comprehensive list of windsurfing boards. Here, I extracted the specifications of a specific board and seamlessly fed them into the GitHub Copilot Chat window. I then prompted Copilot to not only generate sample Java entities but also produce the corresponding SQL script for creating database rows.

The efficiency and effectiveness of GitHub Copilot in this scenario are showcased in the accompanying video. Witness firsthand how this tool streamlines the often laborious task of data generation, saving valuable time and effort in the development process:

Yet again, GitHub Copilot proves to be the hero of my coding journey – making my day, one efficient line of code at a time!

· 4 min read

Quarkus: Default Values for Panache Entity Fields

In the ever-evolving landscape of database technologies, my journey led me away from Java ORM projects for a decade, exploring the realms of NoSQL databases like MongoDB, Couchbase, Redis, and even HBase.

Recently, my focus shifted back to Java and, specifically, Quarkus. In this blog post, I'll share my experience migrating part of my site, windr.org, from MongoDB to PostgreSQL with Quarkus, highlighting how I tackled my first small challenge of setting default values for Panache entity fields.

Choosing Quarkus and Panache:

Having dabbled with Quarkus during my time at Red Hat in 2019, I decided to delve deeper into it for my personal projects. While familiar with using MongoDB directly with Node.js, working with Quarkus and RDBMS prompted me to opt for Hibernate ORM with Panache, a Quarkus extension offering a simplified and user-friendly API for Hibernate ORM.

I have published the code of this example on GitHub:

· 6 min read

In this article, I will explain how to secure your Redis databases using SSL (Secure Sockets Layer). In production, it is a good practice to use SSL to protect the data that are moving between various computers (client applications and Redis servers). Transport Level Security (TLS) guarantees that only allowed applications/computers are connected to the database, and also that data is not viewed or altered by a middle man process.

You can secure the connections between your client applications and Redis cluster using:

  • One-Way SSL: the client (your application) get the certificate from the server (Redis cluster), validate it, and then all communications are encrypted
  • Two-Way SSL: (aka mutual SSL) here both the client and the server authenticate each other and validate that both ends are trusted.

In this article, I will focus on the Two-Way SSL, and using Redis Enterprise.

· 7 min read

Introduction

In this article, I will show you how to update Redis Enterprise on PCF and see how Redis Enterprise cluster will guarantee a service continuity using out of the box failover.

If you need a Cloud Foundry application that calls Redis automatically you can use this project simple-redis-spring-demo-pcf.

For this article, I will upgrade Redis Enterprise for PCF from the version v5.4.2400147 to the latest version, currently v5.4.40700169.

· 8 min read

As you may have seen, I have joined Redis Labs a month ago; one of the first task as a new hire is to learn more about Redis. So I learned, and I am still learning.

This is when I discovered Redis Streams. I am a big fan of streaming-based applications so it is natural that I start with a small blog post explaining how to use Redis Streams and Java.

What is Redis Streams?

Redis Streams is a Redis Data Type, that represents a log so you can add new information/message in an append-only mode (this is not 100% accurate since you can remove messages from the log). Using Redis Streams you can build "Kafka Like" applications, what I mean by that you can:

  • create applications that publish and consume messages (nothing extraordinary here, you could already do that with Redis Pub/Sub)
  • consume messages that are published even when your client application (consumer) is not running. This is a big difference with Redis Pub/Sub
  • consume messages starting a specific offset, for example, read the whole history, or only new messages

In addition to this, Redis Streams has the concept of Consumer Groups. Redis Streams Consumer Groups, like Apache Kafka ones, allows the client applications to consume messages in a distributed fashion (multiple clients), providing an easy way to scale and create highly available systems.

Enroll in the Redis University: Redis Streams to learn more and get certified.

Sample Application

The redis-streams-101-java GitHub Repository contains sample code that shows how to

  • post messages to a streams
  • consume messages using a consumer group

· 5 min read

In this article we will see how to create a pub/sub application (messaging, chat, notification), and this fully based on MongoDB (without any message broker like RabbitMQ, JMS, ... ).

So, what needs to be done to achieve such thing:

  • an application "publish" a message. In our case, we simply save a document into MongoDB
  • another application, or thread, subscribe to these events and will received message automatically. In our case this means that the application should automatically receive newly created document out of MongoDB

All this is possible with some very cool MongoDB features: capped collections and tailable cursors,

· 4 min read

An easy way to create large dataset when playing/demonstrating Couchbase -or any other NoSQL engine- is to inject Twitter feed into your database.

For this small application I am using:

In this example I am using Java to inject Tweets into Couchbase, you can obviously use another langage if you want to.

The sources of this project are available on my Github repository Twitter Injector for Couchbase you can also download the Binary version here, and execute the application from the command line, see Run The Application paragraph. Do not forget to create your Twitter oAuth keys (see next paragraph)

Create oAuth Keys

The first thing to do to be able to use the Twitter API is to create a set of keys. If you want to learn more about all these keys/tokens take a look to the oAuth protocol : http://oauth.net/

1- Log in into the Twitter Development Portal : https://dev.twitter.com/

2- Create a new Application

Click on the "Create an App" link or go into the "User Menu > My Applications > Create a new application"

3- Enter the Application Details information

4- Click "Create Your Twitter Application" button

Your application's OAuth settings are now available :

5- Go down on the Application Settings page and click on the "Create My Access Token" button

You have now all the necessary information to create your application:

  • Consumer key
  • Consumer secret
  • Access token
  • Access token secret

These keys will be uses in the twitter4j.properties file when running the Java application from the command line

Create the Java Application

The following code is the main code of the application:

Some basic explanation:

  • The setUp() method simply reads the twitter4j.properties file from the classpath to build the Couchbase connection string.
  • The injectTweets opens the Couchbase connection -line 76- and calls the TwitterStream API.
  • A Listener is created and will receive all the onStatus(Status status) from Twitter. The most important method is onStatus() that receive the message and save it into Couchbase.
  • One interesting thing : since Couchbase is a JSON Document database it allows your to just take the JSON String and save it directly. cbClient.add(idStr,0 ,twitterMessage);

Packaging

To be able to execute the application directly from the Jar file, I am using the assembly plugin with the following informations from the pom.xml:

  ...
<archive>
<manifest>
<mainclass>com.couchbase.demo.TwitterInjector</mainclass>
</manifest>
<manifestentries>
<class-path>.</class-path>
</manifestentries>
</archive>
...

Some information:

  • The mainClass entry allows you to set which class to execute when running java -jar command.
  • The Class-Path entry allows you to set the current directory as part of the classpath where the program will search for the twitter4j.properties file.
  • The assembly file is also configure to include all the dependencies (Twitter4J, Couchbase client SDK, ...)

If you do want to build it from the sources, simply run :

mvn clean package

This will create the following Jar file ./target/CouchbaseTwitterInjector.jar

Run the Java Application

Before running the application you must create a twitter4j.properties file with the following information :

twitter4j.jsonStoreEnabled=true

oauth.consumerKey=[YOUR CONSUMER KEY]
oauth.consumerSecret=[YOUR CONSUMER SECRET KEY]
oauth.accessToken=[YOUR ACCESS TOKEN]
oauth.accessTokenSecret=[YOUR ACCESS TOKEN SECRET]

couchbase.uri.list=http://127.0.0.1:8091/pools
couchbase.bucket=default
couchbase.password=

Save the properties file and from the same location run:

jar -jar [path-to-jar]/CouchbaseTwitterInjector.jar

This will inject Tweets into your Couchbase Server. Enjoy !