Automation is a key element of modern software development and deployment. GitHub with GitHub Actions allows you to automate many tasks, starting with your continuous integration and continuous deployment... but GitHub Actions a lot more than a CI/CD, you can use it for provisioning your environments, automating some project management tasks. However, it is not the purpose of this post, where I want to focus on the development of your own Github Action!
An "Action" is the reusable component of a workflow, and when you create your automation you will start by searching the GitHub Marketplace to look for actions to achieve a specific task. In addition to the thousands of actions available on the marketplace, and available in open source communities, you can create your own actions.
This blog post will guide you using a concrete example, through the steps to create your actions, and this is just "my version" of the official Creating Actions documentation chapter.
Let's say for example that you want to enforce the fact that your repositories have always a README.md and a LICENSE file. And when the repository is not compliant with these rules the workflow should fail and provide clear information to the user.
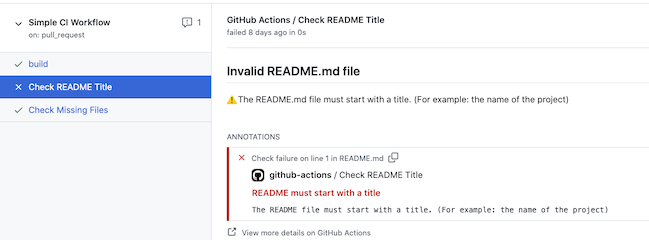
The following screenshot shows messages and alerts raised by the actions during an integration workflow:
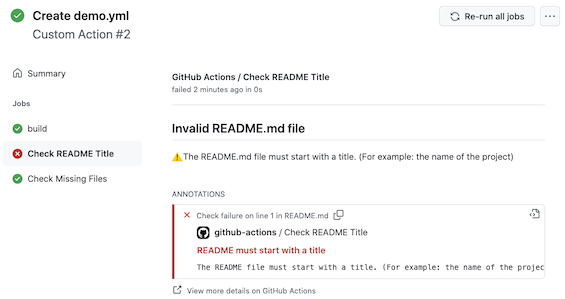
📕 In this first post, you will learn how to:
- Create an action
- Publish the action
- Use the action in a workflow
- Add some logic to control the workflow's success or failure.
📗 In a second post, you will learn how to:
- Create custom Checks
- Add some detailed annotation with reference to source code (lines) with error
- Deploy the action
If you prefer a video version of it, take a look to "Build Your Own Action" on YouTube.
It is time now to dive into the example!
